1. What Is the Exposure Triangle?
The exposure triangle is a foundational concept in photography that balances three settings—aperture, shutter speed, and ISO—to control the amount of light reaching the camera sensor. This interaction determines the brightness, sharpness, and creative effects of your photo.
2. Why Is the Exposure Triangle Important?
Understanding the exposure triangle allows photographers to:
- Capture correctly exposed images in any lighting condition.
- Balance light and artistic intent for creative compositions.
- Gain full control over their camera, moving beyond auto modes.
3. The Three Components of the Exposure Triangle
The exposure triangle consists of:
- Aperture: Controls the lens opening, affecting depth of field and brightness. A wider aperture (lower f-stop) allows more light in, creating a shallow depth of field, while a narrower aperture (higher f-stop) reduces light, increasing depth of field.
- Shutter Speed: Determines how long the sensor is exposed to light, controlling motion blur or sharpness. Faster shutter speeds freeze motion but let in less light, while slower shutter speeds capture motion blur and allow more light.
- ISO: Adjusts the sensor’s sensitivity to light, influencing brightness and noise. Lower ISO values produce cleaner images but require more light, whereas higher ISO values work better in low light but can introduce digital noise.
These three settings are interconnected: adjusting one requires compensating with the others to maintain proper exposure. For example:
- If you widen the aperture for more light, you might need a faster shutter speed or a lower ISO to avoid overexposure.
- Increasing ISO in low light could allow for a faster shutter speed, reducing motion blur.
Together, they influence each other, creating balance and flexibility for perfect exposure. For instance, in low-light conditions, you might need to use a wider aperture and higher ISO while reducing shutter speed to avoid camera shake.
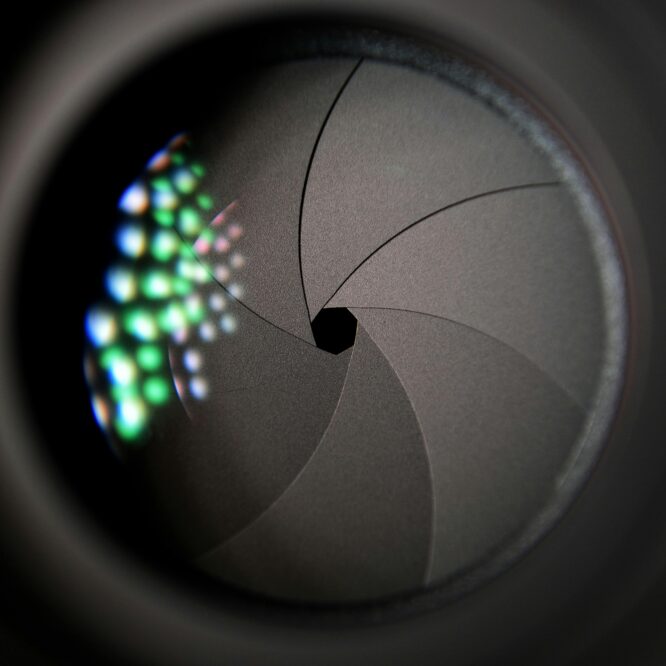
4. Aperture: Controlling Depth of Field
How Aperture Is Measured:
- Measured in f-stops (e.g., f/1.8, f/16). Lower f-stop = wider opening = more light and shallow depth of field.
- Higher f-stop = narrower opening = less light and greater depth of field.
The Effects of Wide vs. Narrow Aperture:
- Wide (f/1.4–f/2.8): Isolate subjects with blurred backgrounds (bokeh).
- Narrow (f/11–f/22): Capture sharpness across the entire scene, ideal for landscapes.
5. Shutter Speed: Capturing Motion
Shutter Speed Basics:
- Measured in seconds or fractions (e.g., 1/1000s, 1s).
- Fast shutter (1/500s): Freezes motion. Perfect for sports.
- Slow shutter (1s or longer): Captures motion blur, ideal for light trails.
Freezing vs. Blurring Motion:
- Freeze: Use faster shutter speeds for sharp images of moving subjects.
- Blur: Experiment with slower speeds for creative effects like flowing water or star trails.
6. ISO: Sensitivity to Light
Low ISO vs. High ISO:
- Low ISO (100–200): Clean, detailed images in bright light.
- High ISO (1600+): Better in low light but introduces digital noise.
Managing Noise:
- Use a tripod to avoid high ISO in dim conditions.
- Apply noise reduction in post-processing for cleaner results.
7. How the Exposure Triangle Works Together
The exposure triangle is not just about understanding its three components in isolation; it’s about mastering their interplay to achieve a balanced and creative photo. Here’s how they specifically interact:
1. Balancing Light:
- Scenario: You want to shoot a portrait in dim light.
- A wide aperture (f/1.8) lets in more light and creates a shallow depth of field, isolating the subject.
- To prevent overexposure, you increase shutter speed (e.g., 1/200s) and lower the ISO to maintain clean, noise-free details.
- Result: A well-exposed portrait with a blurred background.
- Scenario: You’re shooting action outdoors in bright light.
- A fast shutter speed (1/1000s) freezes motion, but this reduces light reaching the sensor.
- A moderate aperture (f/5.6) balances light while keeping enough depth of field.
- Lowering ISO (e.g., ISO 100) avoids over-brightening, ensuring vibrant colors.
- Result: A sharp, detailed image of a moving subject.
2. Creative Adjustments:
- Shallow Depth of Field + Low Light:
- Use a wide aperture (e.g., f/2.8), increase ISO (e.g., 400), and slow shutter speed (e.g., 1/60s).
- This combination allows sufficient light for exposure while maintaining focus on the subject.
- Sharp Landscape + High Light:
- Use a narrow aperture (e.g., f/16), slow shutter speed (1/30s), and keep ISO low (ISO 100).
- This ensures sharpness across the scene with minimal noise.
3. Understanding Reciprocity:
Reciprocity refers to how a stop change in one component can be balanced by an opposite change in another.
- Example:
- If you widen your aperture from f/4 to f/2.8 (1 stop), you can increase shutter speed from 1/60s to 1/125s (1 stop faster) while maintaining the same exposure.
4. Trade-offs and Priorities:
Each adjustment affects exposure and artistic results differently:
- Prioritize Aperture for portraits or macro shots (control depth of field).
- Prioritize Shutter Speed for motion-focused shots.
- Prioritize ISO for darker settings when aperture and shutter speed limits are reached.
Practical Tips for Combining Components:
- Use aperture priority mode for scenes requiring specific depth of field.
- Use shutter priority mode for motion-focused shots.
- Practice full manual mode to gain complete creative control.
8. Finding the Perfect Exposure
Using Light Meters:
- Built-in meters guide exposure adjustments.
- External meters provide more precise readings.
Understanding Exposure Stops:
- Adjustments measured in stops: ±1 stop doubles/halves light.
- Example: Moving from f/2.8 to f/4 decreases light by one stop.
9. Common Exposure Triangle Mistakes to Avoid
- Overexposure: Too much light washes out details.
- Underexposure: Insufficient light makes images too dark.
- Ignoring Depth: Misjudging aperture leads to unwanted focus effects.
- High Noise: Excessive ISO creates grainy photos.
10. Creative Uses of the Exposure Triangle
- Aperture: Isolate subjects with bokeh or capture landscapes in sharp detail.
- Shutter Speed: Create light trails or freeze action shots.
- ISO: Balance light sensitivity creatively when light is limited.
11. Practical Tips for Beginners
Quick-Start Checklist for Beginners:
- Choose a well-lit scene to practice.
- Set your camera to manual mode.
- Adjust aperture to control focus depth.
- Experiment with shutter speed to freeze or blur motion.
- Test ISO settings for brightness vs. noise.
- Review images and refine settings.
- Practice in varied lighting: indoors, outdoors, and golden hour.
- Use aperture or shutter priority modes for gradual control.
12. Tools to Practice the Exposure Triangle
- Apps: “Photography Basics” and “Exposure Simulator.”
- Cameras: Beginner-friendly models like Canon EOS Rebel or Nikon D3500.
- Accessories: Tripods for stability and Sekonic light meters for precise exposure.
13. Real-Life Examples and Scenarios
Scenario 1: Portrait Photography
- Aperture: Wide (f/2.8) for shallow depth of field.
- Shutter Speed: 1/125s to avoid motion blur.
- ISO: 100 in bright settings, 400 indoors.
Scenario 2: Landscape Photography
- Aperture: Narrow (f/11–f/16) for sharpness across the scene.
- Shutter Speed: 1/60s or longer with a tripod.
- ISO: 100 for clarity.
Scenario 3: Action Shots
- Aperture: Moderate (f/5.6) to balance focus.
- Shutter Speed: 1/1000s to freeze motion.
- ISO: Adjust based on light.
14. FAQs About the Exposure Triangle
- Why do my photos look grainy? High ISO causes digital noise.
- How do I blur a background? Use a wide aperture (low f-stop).
- What shutter speed should I use for sports? Use fast speeds like 1/500s or quicker.
- Can I fix exposure mistakes later? Yes, but it’s best to get it right in-camera to maintain quality.
15. Conclusion: Mastering the Art of Exposure
Mastering the exposure triangle unlocks creative potential and technical control over your photography. Practice combining aperture, shutter speed, and ISO to achieve the perfect balance for any scene. Experiment often, review your results, and continue refining your skills to become a more confident and capable photographer.